Cable Management Pre Release is the first step in the Cable Management Process.
The Pre Release function allows the user to create an item for release before creating the actual release, thus allowing the user to manipulate the cable cuts and then hold the selection until cable is delivered. Function is located in CMMS under Releasing -> Cable Management -> Cable Management Pre Release.
Cable Cuts Pre Release will always:
Be the first step in the Drawing Releasing Process.
Calculate minimum drawing quantity.
To release cable from another project please see Cable Management Bin Selection.
STEP ONE: CREATE PRE-RELEASE
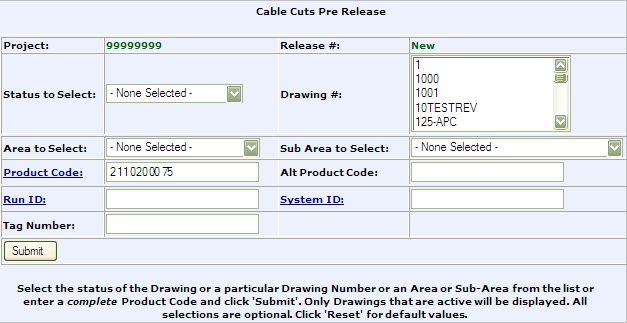
Select Cable Management Pre Release, from the CMMS Releasing Menu, to begin the Pre Release.
Initial selections to create Pre Release may be by any of the following criteria or combination of:
Status
Drawing Number(s)
Area
Sub Area
Product Code
Alternate Product Code
Run ID
System ID
Tag Number
Hit Submit to find items matching the search criteria entered.

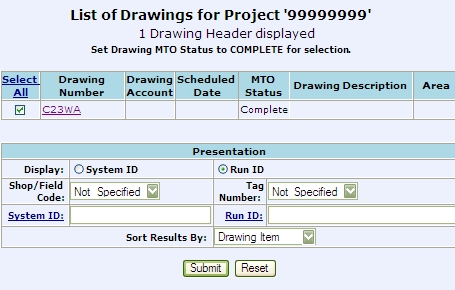
Notice on the above screen that the only Drawings that are able to be processed are those which have an MTO Status = to Complete.
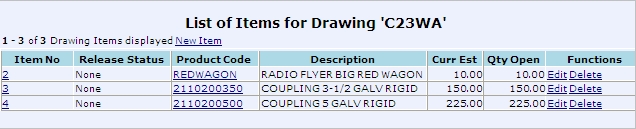
Click on the Drawing Number (above) to retrieve the list of items that are contained on the drawing.
Returning to the initial screen, place a check in the box of the drawing to process and click Submit.
The following page, with the List of Items for the Release, is where all the work will be done. Note that when you are in this phase of the process other users cannot access these Reels for Cable Management.
Select the specific items, from the drawing, to process. Enter the Quantity to Release for each item.

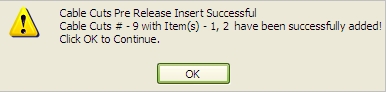
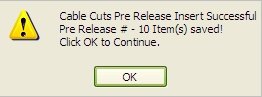
Hit submit to generate Cable Cut Pre Release and be returned a Cable Cut number.
When you are finished adding items and the Pre Release has been generated, return to the Cable Cut Search and call up the cut you just generated.
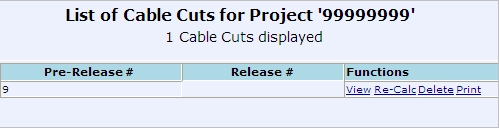
The Print function is not available until after the Cable Cuts have been Held.
Use the Delete function to remove the entire cable cut. Can only be done prior to releasing.
To see the items added to the Cable Cut select View.

** If no bin location is displayed the Cable Cut View will state 'No Cable Available', if Max Bin Qty less than Release Qty display will state 'Bin Qty Short'
Select Re-Cal to see what the computer calculated for each required cut. To recalculate cuts select Re-Cal from the functions menu.
If an item that you added to the Release doesn't show up when you select Re-Calc it is because
the inventory quantity isn't sufficient to fulfill the cut
or there is no quantity open on the drawing for the selected product code.
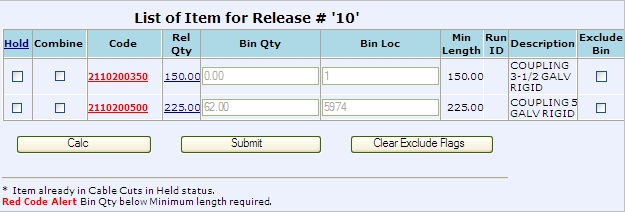
** RED CODE ALERT - When you see a product code presented above in Bold Red Numbers the system is alerting you to the fact that the quantities presented, if selected, will cause that product code to be BELOW the minimum length required for the project. You may select a bin in this status but the minimum amount required to fullfil your cut needs will not be available with out further adjustments down the line. A warning message will be returned for EACH bin that is less than the minimum drawing item quantity required.
Calc (re-calc) Column Descriptions on the above screen:
Hold box - When you are satisfied with the Cable Cut selection, check the Hold box. This selection is required to proceed with the cable cut. While a hold status exist for a cable cut no other cuts may be submitted. Only one cut is allowed at a time.
HELD STATUS SIGNIFIES THAT THE MATERIAL IS READY TO BE CUT BUT HASN'T YET. Once the items are placed on hold, through the pre release process, the bin location will show the item committed. No other cuts will be permitted to be assigned to a bin that is in a committed status.
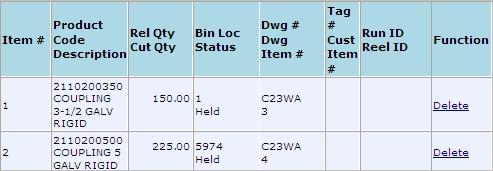
If a user attempts to cut cable from a bin that has a held status they will be presented with a screen that has an * in the Hold column, which designates that "Item already in Cable Cuts in Held Status."
To find out where the Held Status is use the Cable Search Function.
** ONLY AFTER THE PRE-RELEASE IS PUT INTO A HELD STATUS WILL THE USER BE ABLE TO RELEASE THE MATERIAL. UNTIL A TICKET IS CREATED YOU CAN NOT ASSIGN ANOTHER PRE-RELEASE TO THE SAME MATERIAL.
The Combine box takes the total Release Qty of the combined Reels and finds the best Bin match. Check the Combine box and hit calc to recalculate. After calculating the bin with the best match will be selected automatically - the selected bin will now have a check in the Hold column,
The Code is the Product Code from the Release; this is also a pop-up link that will list all Bins associated with the Product Code.

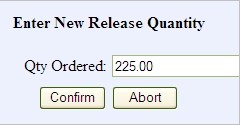
The Rel Qty is the Release Item Quantity; if you click on Rel Qty, a pop-up link will open displaying the current release quantity. Users may change the Release Item Quantity at this point by entering a new quantity and clicking Confirm.
** Cable may be used from another project, which is part of a consolidated project, by selecting a Bin Location outside of the releasing Project. Please see Cable Management Bin Selection for specifics.
The Bin Qty is the available quantity of the Reel (this includes the quantity being released)
*** THE BIN QUANTITY FOR THE ITEM IN THE PROJECT CATALOG WILL NOT BE ADJUSTED UNTIL THE DT TICKET IS CREATED.
Bin Loc is the Bin Location(s) of the Reel within the Project Catalog.
Min Length - the computer looks, and displays, the minimum length of cable needed through out the entire project (MINIMUM length is in REAL TIME)
Description is the Short Description of the Product Code from the Project Catalog.
Exclude Bin box will not use the pre-selected Bin for the calculation if selected.
![]()
Button Descriptions (for the above screen):
The Calc button will re-calculate the selection process based on your request. Only during the calculation process will the bin show a committed status. This is done so that multiple calculations are not processed at the same time.
The Submit button sets the Bins to be used and displayed on the Cut Sheet.
Clear Exclude Flags button will reset the Bins previously excluded from the process and allow them to be used in the next Calc function.
----------------------------------
Each time you change a variable select the Calc function to see the new results. Keep doing this until you get the results you are looking for.
When the Hold button is selected then that line item is taken out of the mix.
Only select Submit when you are satisfied with all the results.
CHANGES AND MODIFICATIONS ARE PERMITTED, WITHIN A PRE-RELEASE UNTIL A RELEASE IS CREATED. AFTER THE RELEASE IS CREATED, CHANGES WILL NO LONGER BE PERMITTED.
STEP 2 - CREATE RELEASE